Once you have determined your budget and time you want to spend, it is time to pick your destination. Just know you will need two to three days to travel through airports. No, you won’t see everything the city offers in one trip.
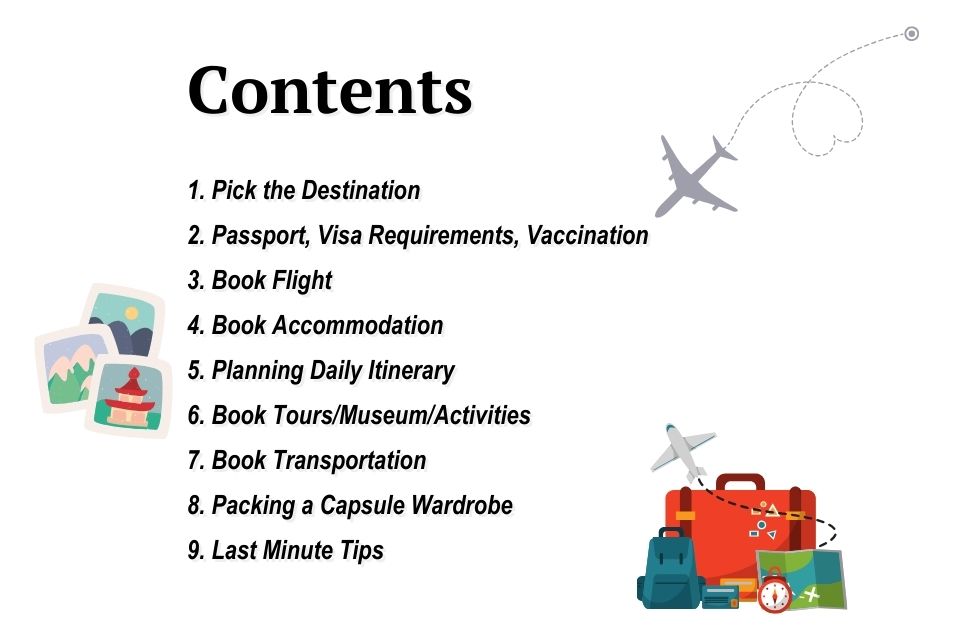
This post is long, so I want to give you a quick overview, and then, if you want to skim through to find the parts you are interested in, look for the bold, pink words throughout.
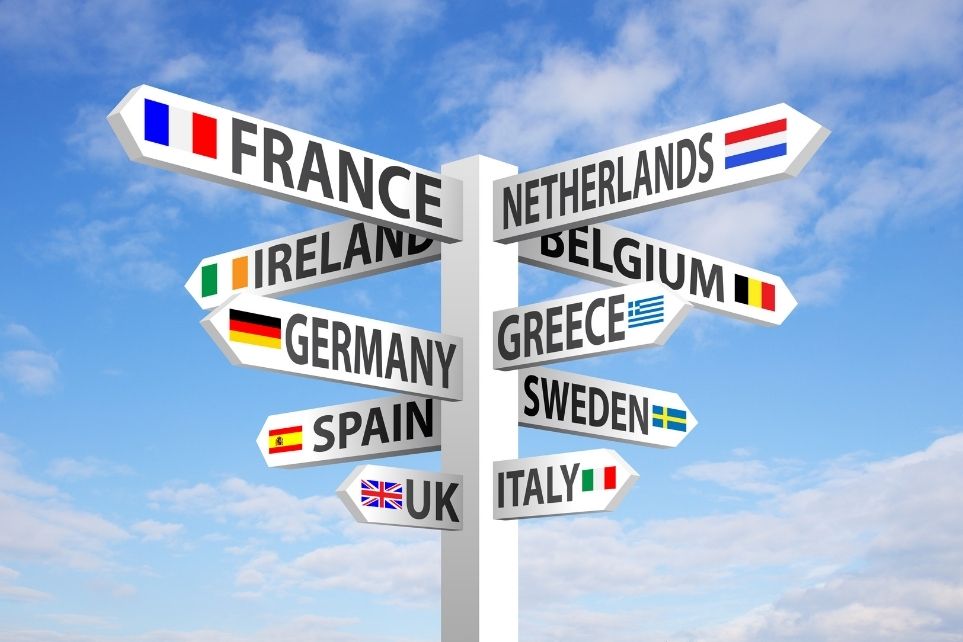
Pick the Destination
If you have never traveled abroad, it may be challenging to pick one city of many for your first trip. An excellent way to start is to ask yourself a few questions:
-
- What time of the year do you want to travel? Is the weather in the city you wish to visit ideal during this time of the year?
- What are all the things you want to see in the city?
- Do you want a guided tour, an activity adventure, or a self-guided trip on this vacation?
- Self-guided trips will require you to do more research and organize your itinerary.
- Do you want to go to a particular festival or seasonal activity?
- Do you want a destination that offers a mix of art, museums, activities, and sightseeing?
- How easy is it to get around in the city? Is it walkable, or does it offer public transportation?
- What are the restaurant options and prices?
- What are common issues travelers face, and can you handle them?
- What type of accommodations is available, and rates?
- How many days are needed to explore the chosen destination?
Answering questions like these will help narrow down the best option. You want to enjoy your time while on vacation, so it is best to alleviate disappointment by doing your research.
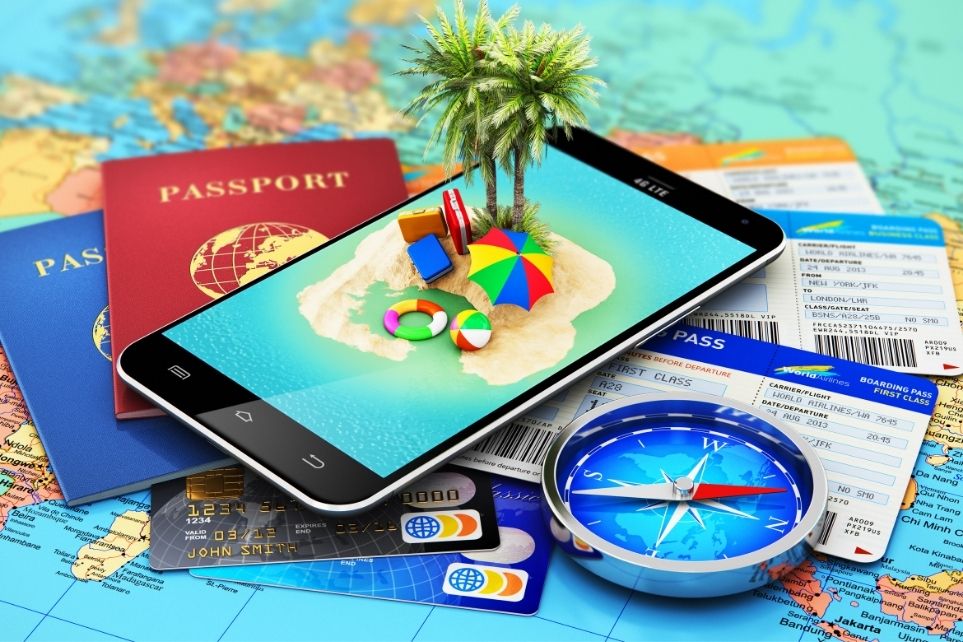
Passport/ Visa/ Vaccinations
Once you have selected the destination, you will need to understand what is required to enter the country by going to the Country Information page of travel.state.gov if you are a U.S. citizen.
-
- Most countries will require that your passport not expire within six months of your travel date.
- Find out how many blank pages in your passport booklet are required by the country you are visiting. Some require at least one free page left in your passport.
Starting in 2024, you will need a visa to travel to Europe. Some of these can be obtained upon arrival at the airport. However, some countries allow you to obtain a visa 90 days in advance online. Do your research!
Find out if the country you are visiting requires vaccination or COVID testing.
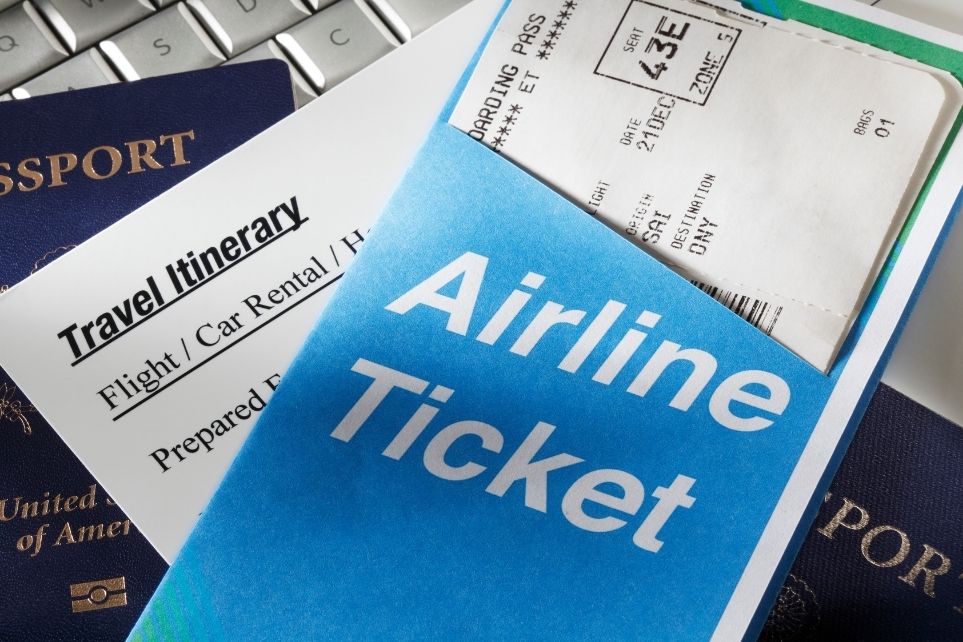
Book Flight
After selecting the destination and getting all the necessary documentation, it’s time to search for the best airline ticket. This will probably be the most expensive part of your trip.
Travel apps are the best place to find the best airline fare deals. Apps that I find most useful are Skyscanner, Kayak, Expedia, Travelocity, and Google Flights. You can set up notifications to know when a good deal is offered!
Another great resource is to check with your credit card company, as they sometimes offer points that can be used toward an airline ticket purchase. Also, see if your credit card offers flight insurance, which is a benefit if you have to change your travel plans for some reason.
Just know that summer (May–August) is considered a high season for most Europe and Caribbean destinations.
Book Accommodation
The second most significant expense will be your hotel. Depending on the duration of your trip and the type of accommodation you seek, these overnight stays quickly add up. Places to search for hotels are at Booking.com or Hotels.com. If you want to go for more boutique hotels or apartment rentals, then Airbnb or VRBO are good options. If you want more of a community-style accommodation, try Hostel World.
A great place to read reviews about hotels is on TripAdvisor. Don’t skip this step when selecting your accommodations.
Planning Daily Itinerary
Now the fun starts! Most often, I prefer this part of planning our trips than dealing with booking airline tickets or searching for hotels. We typically don’t do guided trips, so I must create an itinerary with sightseeing and activities.
I will break down step-by-step processes of building an itinerary and how I organize sightseeing activities.
Research
Like any project, you must begin with research and collecting information. This part may seem daunting and overwhelming, but the payoff will come in the end. As you dive into the research, start with the simplest point of your trip and go from there. For example, you will be traveling to Lisbon on a seven-day trip, so search on the internet for “7-Day Itinerary to Lisbon” to find itineraries that other people have created and examine how they organized their days.
Here are some of my favorite places to gather information:
-
- Pinterest – the platform is excellent for gathering helpful information about traveling and so much more. You can save Pins for reference.
- TikTok – many vloggers are using TikTok to showcase some fantastic destinations. Again, you can save TikTok collections for reference.
- Facebook – Join Facebook groups that provide information about tips on travel to the destination of your choice. Ex: Travel Tips in Portugal. You find travelers sharing recommendations and suggestions or asking questions that can be useful.
- Blogs/Articles – You can find many travel articles/blogs to learn about travel. Today, there are many travel bloggers out scouting amazing cities and sharing their experiences.
- YouTube – If you enjoy more of a visual learning experience, I suggest you look at travel videos that travel bloggers and journalists have created.
- Official Tourism Board – A great resource is to visit the local tourism board/office of the city you wish to visit. Here, you will find itineraries, discounts, and other recommendations to make your trip rewarding.
Working Document
As I gather information from different sites, I save websites, videos, and articles to “working documents.” This document can become quite long, but that is okay because you can weed through it once you decide what you want to accomplish while on vacation.
Here is a screenshot of my “working document.”
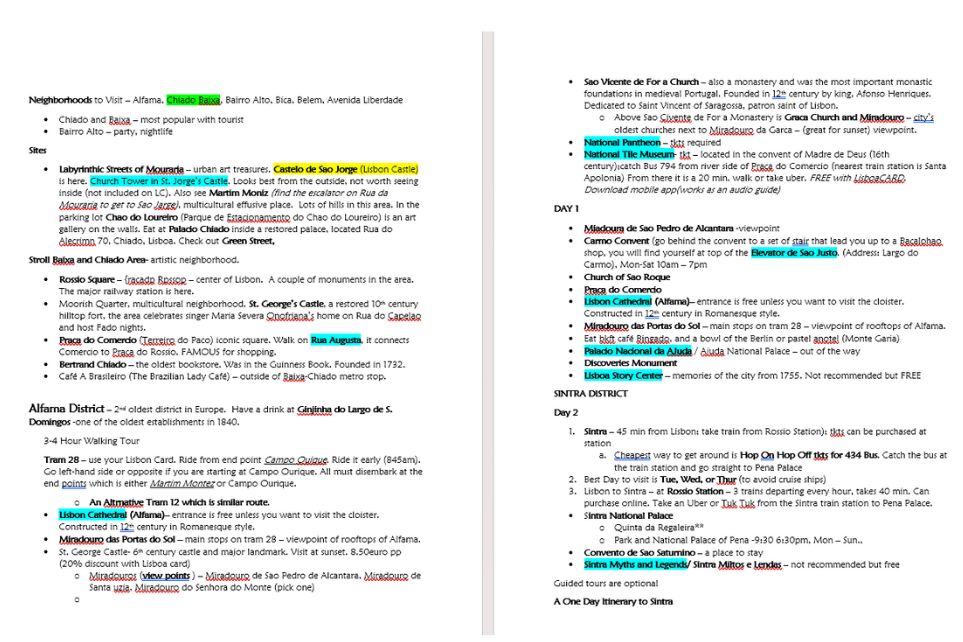
As you do your research, take note of such things as the websites, hours of operation, admissions, best times of day to visit, FREE activities, and things to be AWARE of while visiting.
We are always looking for ways to save money when traveling. One great tool if traveling to Europe is downloading Rick Steves‘ Audio Tours, which offer FREE walking tours. Most major European cities offer free walking tours that expect some tip at the end. If you want to do it alone, Rick Steves is a great option.
My notes include sites, activities, hotels, and recommendations for restaurants and coffee shops. Sometimes, I will include great places to grab groceries or a good place to shop for leather goods. It all depends on your preferences.
Organize Sightseeing by Areas
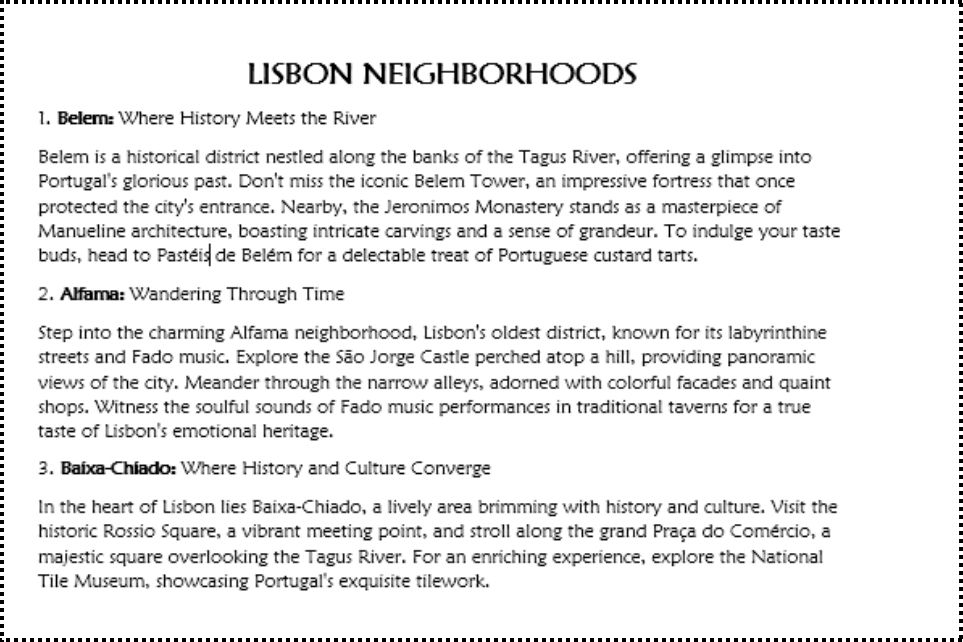
After gathering all your research into a “working document,” it is time to get it organized. Now, you have learned the names of neighborhoods/areas you want to visit.
SUBTITLES: Neighborhoods/Areas
These areas will become subsets to the “major” city, so you will begin organizing the information you collected into those groups.
Create subtitles with the neighborhood/area name. Move the information you have collected under the correct subtitle. Here is an example of a working document for my trip to Lisbon.
With each bullet point within this subtitle, include the name of the site and any additional details you might find helpful.
MAP IT!
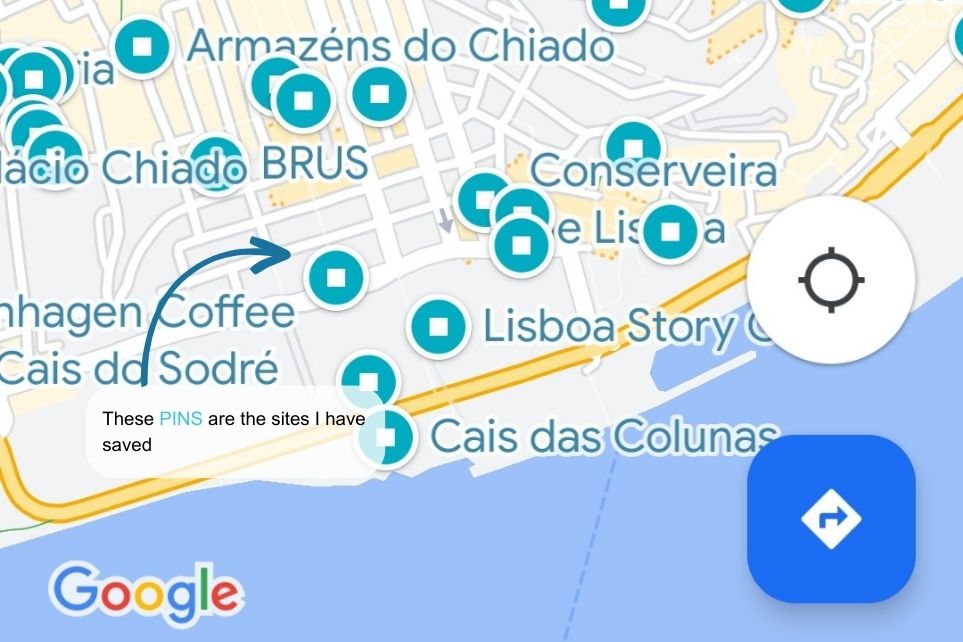
Now that you have organized all the sites/activities under subtitles, it is time to plot them on Google Maps. I like to PIN them on a map to identify their location and group them. Then, as I continue to PIN other sites, I can see distances between sites and where my focus for the trip needs to be.
As you PIN sites, make sure to SAVE under the SUBTITLE name on Google Maps. For example, I saved all the sites within the Alfama neighborhood of Lisbon under “Lisbon Alfama.”
I do this when I make an itinerary for the day. I like to try and visit all the possible sites within one area. This will save you time and ensure you don’t miss anything!
- How to Save Pins to a List
-
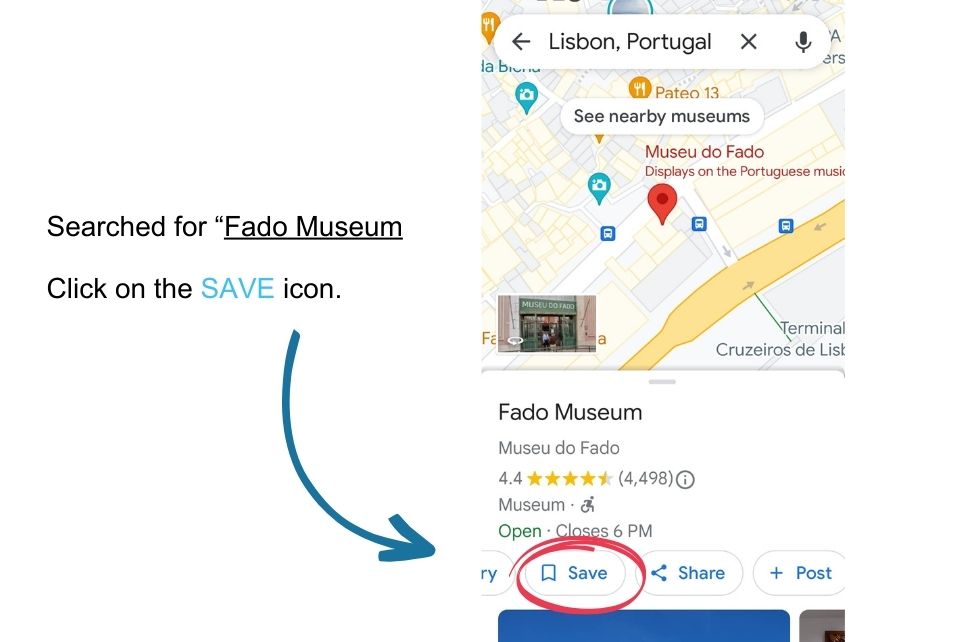
- Type the site that you want to visit and pin.
- When the site pops up, click the SAVE icon button in the menu bar. Here is where you will name the List and save it. Click on the + New List (if you haven’t named your List) and type your SUBTITLE location (EX: Lisbon ALFAMA).
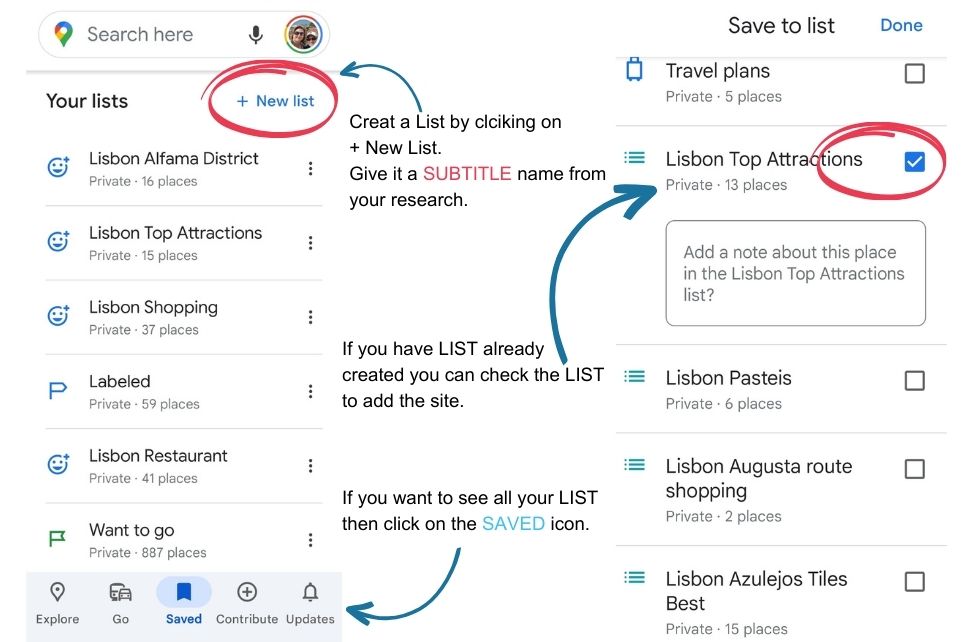
3. In the ADD NOTES box, you include information such as admission, hours, etc.

4. Click DONE; then your location will be saved to the List. Any other sites in this area can be SAVED under this list name.
5. You can make multiple lists for one city. You can create a list of all the restaurants, transportation stops, or hotels.
6. Each pin you save will be identified on the map in a unique color pin.
MY MAPS
Now that you have organized your research into SUBTITLES and have PINNED on Google Maps to understand these sites’ locations, it is time to create a more detailed itinerary on My Map.
My Maps is an extension of Google Maps. If you have never worked with My Maps, it is best to educate yourself with YouTube videos to learn how to utilize all the tools.
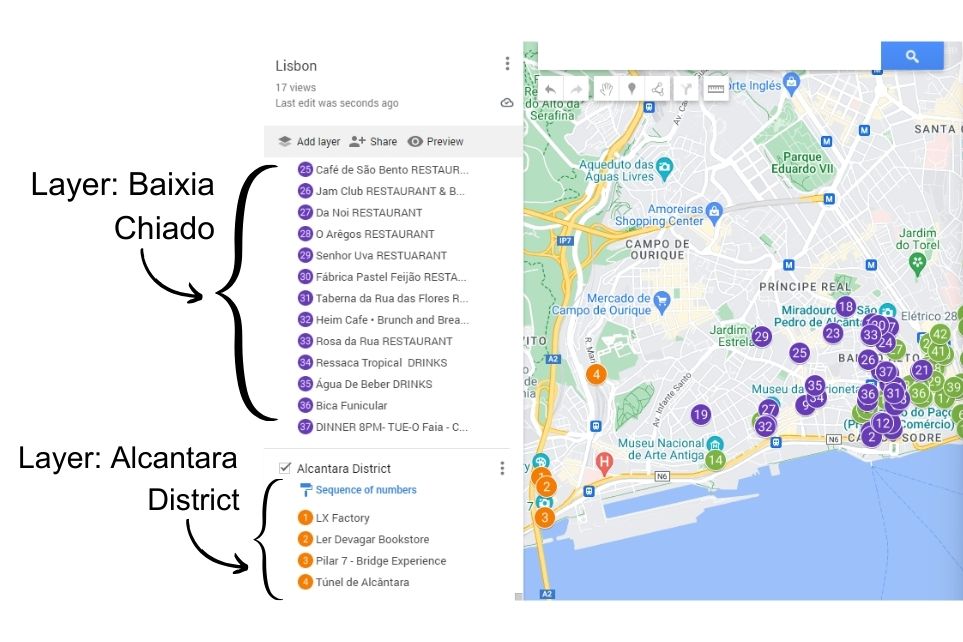
My Maps saved me so much time and trouble while on vacation. The map will identify your Subtitles by LAYERS, color coordinate each layer, and identify each pin with icons that represent the pin. Another great feature is you can put them in sequence order so that I can go from one site to the next.
The map can be viewed offline and on your phone. I also like sharing the map with whomever I am traveling with so they can view it with me.
* Transferring Google Pins to My Maps
After you learn how to build in My Maps, the fastest way to create your LAYERS is to open a split screen on your computer, Google Maps (the GREEN map) and My Maps (the RED map).
For example, I will use my trip to Lisbon, Portugal to demonstrate:
-
-
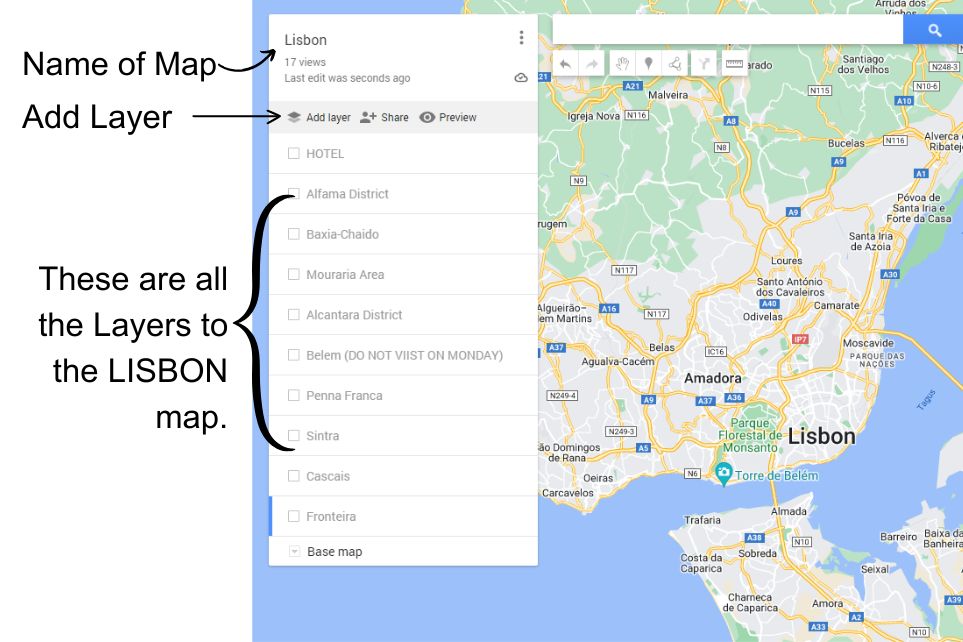
- My Map needs a name, “Untitled map.” This should be a broad name such as the “major” city. (Ex, Lisbon)
- Next in My Maps is to name the LAYER, the same as one of your SUBTITLE names.
-
a. Ex: My Lisbon map identifies a LAYER as Alfama, Baxia-Chaido, Mouraria, Alcantara, Belem, etc., because these are the areas in the city I want to visit.
3. Next, go to the search bar (on My Maps) and type in a site you pinned from the Google map. Click “Add to Map. “
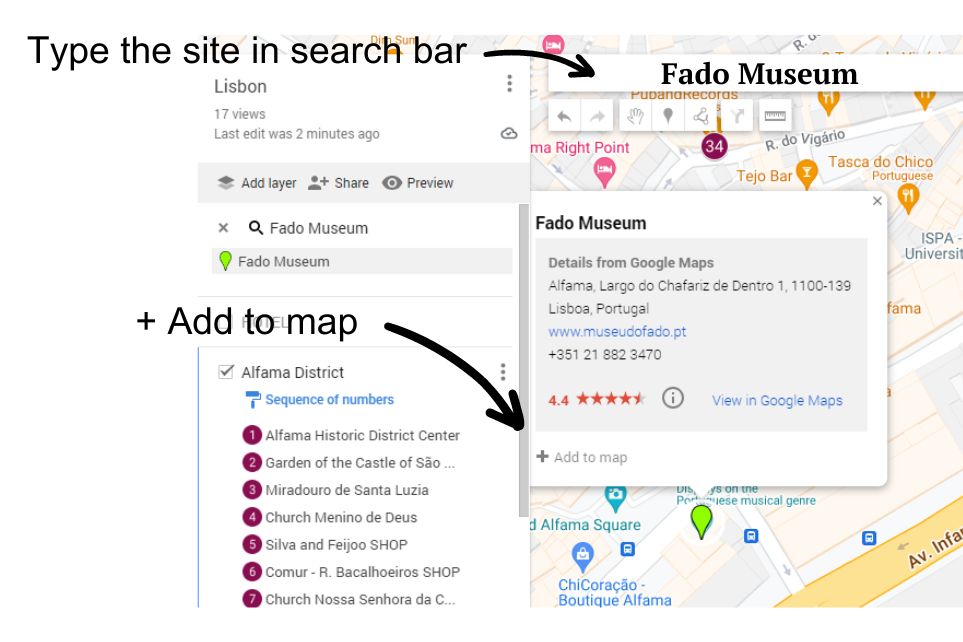
4. Under the LAYER (where the site is listed under), click on Paint Roller (“Individual Styles“) and select Sequence of Numbers.
-
-
-
-
-
- At this point, don’t worry about the order. We will come back to this later.
-
-
-
-
5. Scroll up to the site you just added to the LAYER and add more details if you want about the site, such as:
-
-
-
-
-
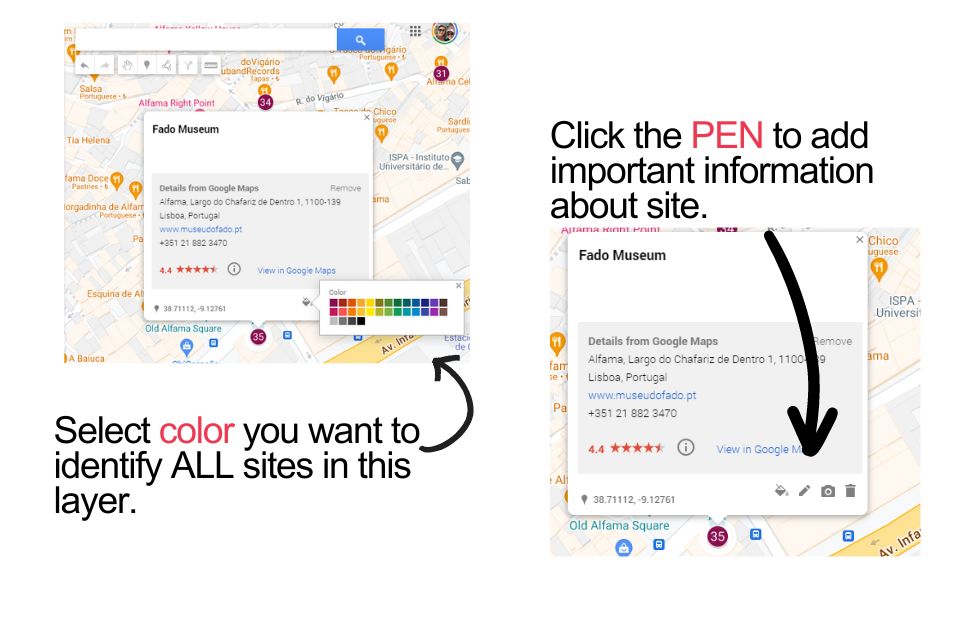
- Paint Bucket – Select the color for all the sites in this LAYER.
- Edit Pen – This will allow you to add your details about this site, such as admission, reservation number, hours of operation, etc.
- While you add more sites in this LAYER, it will automatically put them in sequence and use the same “paint color” for all.
- The only additional step is adding details to that particular pin.
-
-
-
-
6. Once you have identified all the pins for that LAYER, you can put them in the correct sequence based on location by sliding them up or down.
7. Each SUBTITLE from your working document is a new LAYER. You will repeat all the steps above for each LAYER.
Tip: As you research, you may come across where other travelers have built maps that you can save. These will automatically save to your My Maps.
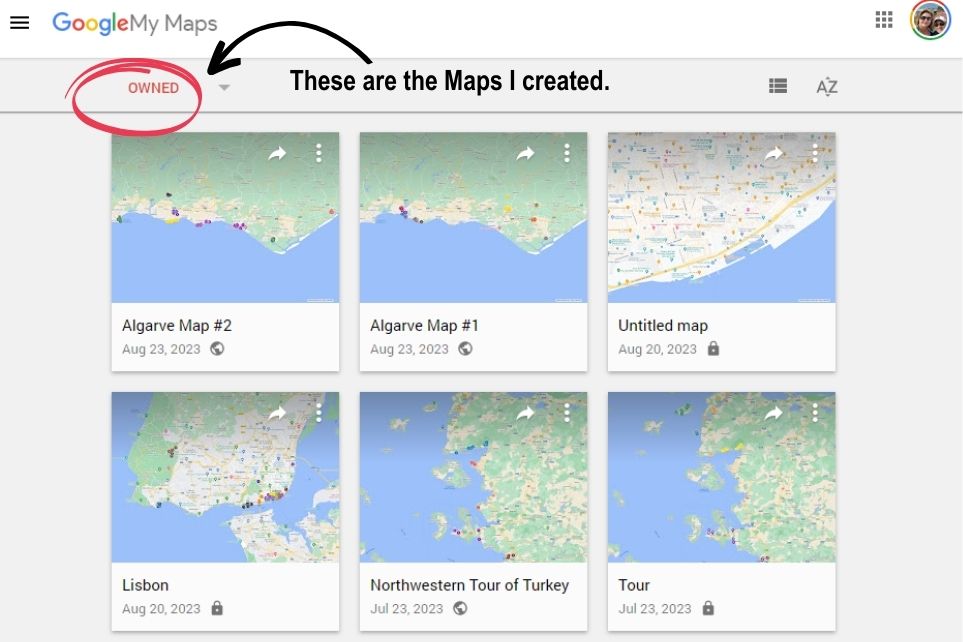
* How You Access “NOT OWNED MAPS”
Click on the dropdown menu bar and click on the NOT OWNED or SHARED option. Here, you will find maps you’ve saved or maps others shared with you.
Building your itinerary on My Maps is one of the best tools I have used in traveling. I like that you can build a walkable map with directions, general information, and other vital details.
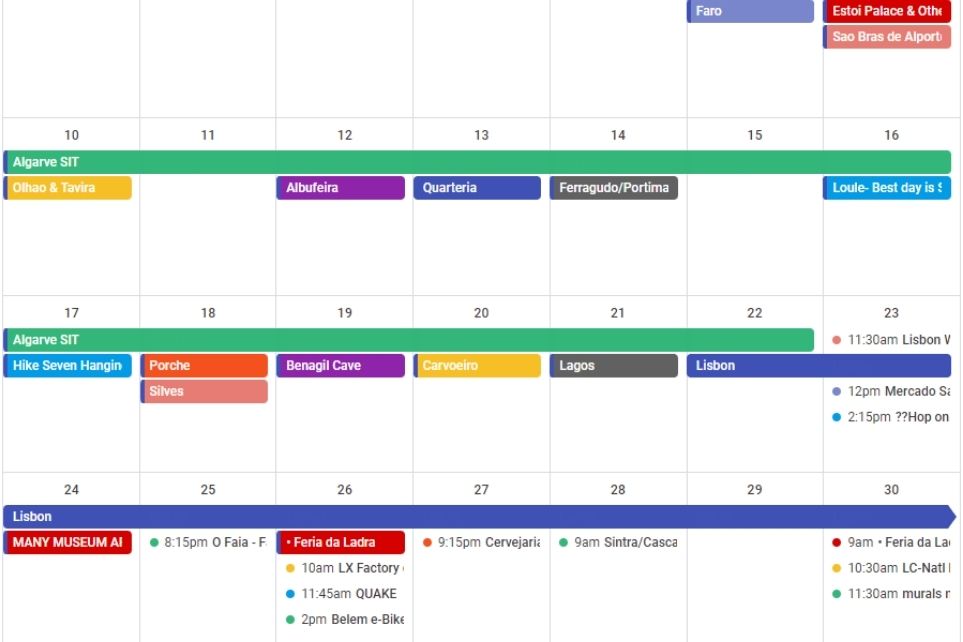
Developing an Itinerary
After you have selected all the sights and activities you want to see and have added them to My Maps, you are ready to build your daily itinerary. I use Google Calendar to share information with others and have it mobile.
Tips:
-
- Do not schedule any activities on travel days to and from your destination.
- Don’t overschedule each day. You will need time to eat, relax, and take daily breaks. You will want some free time to wander about, shop, or revisit a site.
- Consider logistics as you plan your day. Getting from point A to point B may require a train or a long drive.
- If you plan to join a guided tour, consider at least 15-30 minutes; you must arrive before the tour begins.
- Prioritize sites to ensure you allow time and don’t miss out!
Book Tours/Museums/Activities
Once you have figured out each day’s agenda, book tours/activities. Reserve them at least a month from the booking date.
- Airbnb offers some great tours at reasonable prices.
- GetYourGuide is also a common site to find tours.
- Check tour companies that are recommended through your research and read the reviews.
Although I wouldn’t make dinner reservations for every meal, having a few throughout your trip is a nice treat! Check out TripAdvisor for recommendations and read reviews.
TIP: Return to My Maps and save your reservation/booking number and any contact information about the tour/activity.
Book Transportation
After researching your destination, determine the best form of transportation.
For example, in the Algarve region of Portugal, it is more challenging to use public transportation, so we opted to rent a car.
Major cities typically offer public transportation. In this case, it is best to consider purchasing a city transportation card that offers multiple rides on various public transportation.
Other options to consider are taxi, Uber, or Bolt for transportation.
If you plan to rent a car, reserve at least a few months before the departure date. Find out what additional fees will be added later (toll tax, city tax). Check with your own car insurance company for coverage on a rental car.
Another critical factor to consider when renting a car is the cost of gas. In Europe, gas is expensive!

Packing a Capsule Wardrobe
If you are visiting a conservative country, you may need a headscarf and long pants to enter specific religious sites, or if you plan to go to the coastal region, you will want to pack beachwear. Take the time during your research to see what people are wearing.
Some people love to throw something together at the last minute. I like to preplan my outfits. A packing list will depend on the length of the trip, activities, and weather. Jump over to my blog, 5-4-3-2-1 Capsule Wardrobe, and I will show you how to pack for a two-week trip.
Don’t overpack; leave space in your luggage for souvenirs!

LAST MINUTE TIPS
- Make photocopies of your passport before you leave home and store them somewhere safe. Also, keep a copy on the cloud.
- Contact your credit cards and bank to let them know you’d be traveling. Cash is King! Bring a small amount of cash and currency to the city you’re visiting.
- Be prepared to get a local SIM card or a travel Wi-Fi device. Otherwise, you must contact your service provider and add an international plan to use your phone overseas. I find purchasing a SIM card or using TravelWifi portable devices is cheaper than paying for an international plan with my service provider.
- It is wise to inform the embassy about your travel plans. In the USA, you can enroll in STEP online.
- Please email a copy of your itinerary to a family member so they know where you are when you are traveling. Ensure to include details of your airline, hotel, and any other details in case they need to reach you.
- Learn a few essential words and phrases in the native language of the country you’d be visiting. This will get you a long way! If you need more assistance, use Google Translate.
- Beware of cultural customs. For example, is it customary to tip, and how much? Do restaurants, tours, or museums take credit cards?
- Don’t leave your country without getting travel insurance that covers unexpected circumstances such as medical emergencies, stolen documentation, and trip cancellation.
Know, get busy traveling! Please read my blogs about other exciting places around the world at Traveling Lens Photography.
If you want to read more follow me on Facebook, Instagram, or Pinterest as I share my journey.
Happy Travels!

Add to Pinterest Board